It “just works!”


Install pulseaudio-dlna from Ubuntu default repos, then run pulseaudio-dlna. The first time, it failed, but I think that’s because the receiver was switched off. Console output did show it had been detected though. After switching on the receiver then running pulseaudio-dlna again, it redirected my currently playing audio to the receiver after a few seconds! So far this is the first time I’ve managed to get DLNA live streaming working with this receiver in 5 years of owning it.
Note: this post is more intended for personal reference; as such the quality of writing is not up to my standard, but I’ve decided to publish it as-is anyway since I don’t have time to review and figure it could be useful to someone.
I was looking for a good portable Linux laptop to that I could carry around without being too worried about battery life or the device getting scratched up in my bag. I tried a few different devices, including the HP Folio 13, ThinkPad X131e, GPD Pocket, Dell Latitude E7240. Finally I settled on the Acer C720 Chromebook. The main points in favour of this device are, for me:
- Compact, thin and light (11.6″)
- Relatively low cost (4GB RAM model can be had for under $150 CAD)
- Proper modern low-voltage Intel Core processor (Celeron 2957U – Haswell) and not an Atom core or high-end i7
- Dual-band Wi-Fi and Bluetooth
and the main downsides:
- Basic TN LCD panel
- 16GB storage
- Runs Chrome OS
- Chrome OS keyboard layout
The good news is the downsides are fairly easily remedied.
TN LCD Panel
The Acer C720 uses a standard 11.6″ LED backlit eDP panel. I was able to find an IPS panel to replace it on laptopscreen.com (model N116BCA-EA1). The panel replacement is fairly straightforward; care needs to be taken not to break the LCD bezel or any of the clips.
16GB SSD
The SSD on the C720 is a standard M.2 2242 SATA SSD. The M.2 slot is easily accessible after removing the Chromebook’s bottom cover.
Runs Chrome OS
The Chrome OS/Linux dual-boot process is done by using the chrx script (https://github.com/reynhout/chrx). Remember to remove the write-protect screw while the bottom cover is off.
Chrome OS keyboard layout
This was arguably the hardest part. I chose to run Xubuntu, so the steps I went through apply to that environment. Chrx by default provides good defaults, mapping the back, forward, refresh, brightness and volume keys. The big issue for me was the placement of the power button (above the backspace key)
- Prevent systemd-logind from handling the power button
edit /etc/systemd/logind.conf and add the following line:
HandlePowerKey=ignore
- Prevent xfce power manager from handling the power button
xfconf-query -c xfce4-power-manager -p /xfce4-power-manager/logind-handle-power-key -s true
- Allow xfce power manager to handle lid switch
xfconf-query -c xfce4-power-manager -p /xfce4-power-manager/logind-handle-lid-switch -s false
- Remap power key to Delete
xmodmap -e “keycode 124 = Delete”
To find the keycode, stop lightdm, startx to start a basic X session, then use xev to get the keycode for the power key.
Other tweaks
Consistent custom wallpaper/background for boot splash, login, and lock screen
- gnome-screensaver uses the Gnome DE’s wallaper setting. Configure this via CLI:
gsettings set org.gnome.desktop.background picture-uri file:///usr/local/share/wallpaper/animevillage.jpg
- lightdm-gtk-greeter can be configured using GUI tool lightdm-gtk-greeter-settings or by editing /etc/lightdm/lightdm-gtk-greeter.conf
- plymouth/boot splash:
- go to /usr/share/plymouth/themes and create a copy of the xubuntu-logo directory. I called mine xubuntu-logo-mod
sudo cp -R xubuntu-logo xubuntu-logo-mod
- within the new xubuntu-logo-mod directory, rename and edit config files accordingly
325 cd xubuntu-logo-mod/
326 ls
327 sudo mv xubuntu-logo.plymouth xubuntu-logo-mod.plymouth
328 sudo mv xubuntu-logo.script xubuntu-logo-mod.script
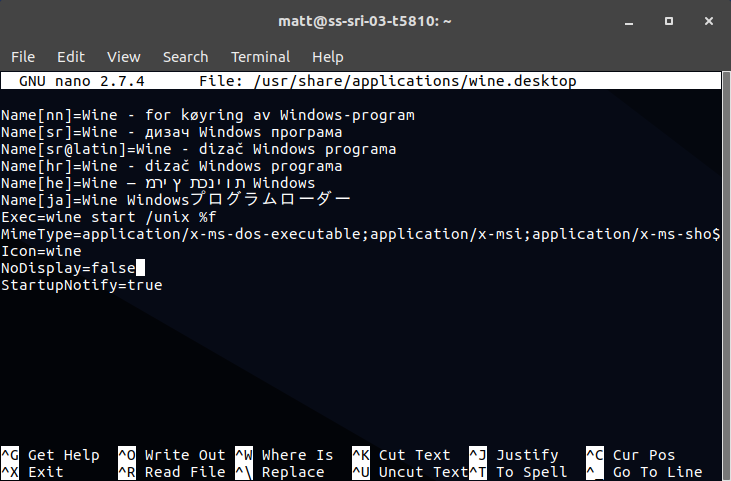
329 sudo nano xubuntu-logo-mod.script
- replace wallpaper.png in xubuntu-logo-mod directory with desired image. I used ImageMagick’s convert tool to convert my jpg format image to png.
- add new theme we have created as an “alternative” with higher priority
Oracle have decided to disable access to Java apps that use MD5withRSA signatures. For instance, when launching the .jnlp file to connect to my Lantronix Spider remote KVM, I am presented with this error:

To fix this, we have to change Java’s security settings. Unfortunately, settings for signature algorithms are not in the Java Control Panel, so we have to edit the config files directly.
On macOS, the default JRE installation’s root directory ($JAVA_HOME) is
/Library/Internet Plug-Ins/JavaAppletPlugin.plugin/Contents/Home
on Windows, it would be
C:\Program Files\Java\jre1.8.0_131
where “1.8.0_131” is your specific Java version, and on Linux, JRE is installed in
/usr/lib/jvm/java-1.7.0-openjdk-amd64
once again where “1.7.0-openjdk-amd64” is your specific Java version.
In the JRE directory, we then need to edit the file
$JAVA_HOME/lib/security/java.security
and comment out the line that starts with “jdk.jar.disabledAlgorithms” by prefixing a #. Note that this will allow jar files signed with any algorithms to run, which can be considered insecure.

Sources:
- https://learningintheopen.org/2017/11/03/java-jnlp-error-weak-signature-algorithm-md5withrsa/
- https://stackoverflow.com/questions/15826202/where-is-java-installed-on-mac-os-x
Quick notes on some tweaks I had to do to get 3CX’s Firewall Check to pass behind my home pfSense firewall:
- Allow PBX to access Google DNS (8.8.8.8): It seems like 3CX is hardcoded to use 8.8.8.8 at the license validation stage. I had blocked 8.8.8.8 on my end to prevent Android and Chromecast devices from preferring external DNS over my local DNS server and this caused the error License_Error httpsError in 3CX.
- Create DHCP-Static mapping for 3CX server.
- Configure NAT Port-forwarding rules: I used the list at https://www.3cx.com/ports-used-3cx-phone-system-v14-v15/ for reference. Table reproduced below.
Protocol
|
Port (Default)
|
Description
|
Port Forwarding Required
|
TCP
|
5001 or 443
|
v15: HTTPs port of Web Server. This port can be configured.
|
Yes – if you intend on using a 3CX client, Bridge Presence, Remote IP Phones from outside your LAN and 3CX WebMeeting functionality.
|
TCP
|
5015
|
V15: This port is used for the online Web-Based installer wizard (NOT 3CX config command line tool) only during the installation process.
|
Optional – During the installation process when the Web-Based installer is used from external source
|
UDP & TCP
|
5060
|
3CX Phone System (SIP)
|
Yes – if you intend on using VoIP Providers, WebRTC and Remote Extensions that are NOT using the 3CX Tunnel Protocol
|
TCP
|
5061
|
3CX Phone System (SecureSIP) TLS
|
Yes – if you intend on using Secure SIP remote extensions
|
UDP & TCP
|
5090
|
3CX Tunnel Protocol Service Listener
|
Yes -if you intend on using remote extensions using the 3CX Tunnel Protocol (within the 3CX clients for Windows / Android / iOS) or when using the 3CX Session Border Controller
|
UDP
|
9000-9500 (default)
|
3CX Media Server (RTP) – WAN audio/video/t38 streams
|
Yes – if you intend on using remote extensions or a VoIP Provider
|
- Configure Outbound NAT Static rule for 3CX server: Automatic Outbound NAT (Default pfSense config) causes a random source port to be used for requests outbound to the Internet. 3CX doesn’t like this behaviour, so we need to add an Advanced Outbound NAT rule to force traffic coming from the 3CX server to use “Static Port” translation, as seen in the following screenshot. For Source, select “Network” and use the 3CX server IP with a mask of /32 (single host).

After completing these steps, the 3CX Firewall Check passes all green.

After installing Wine in Ubuntu Gnome 17.04, I noticed that double-clicking on .exe files in Nautilus still opened them in Archive Manager. I tried the usual right-click > Properties > Open With, but Wine was not listed as an available option.
It turns out that in the Wine package for Ubuntu 17.04, the wine.desktop file is not created in /usr/share/applications, and so does not show up in the Gnome GUI. To make things work, we need to copy the wine.desktop file from /usr/share/doc/wine-stable/examples/ to /usr/share/applications/
sudo cp /usr/share/doc/wine-stable/examples/wine.desktop /usr/share/applications/
Then edit the .desktop file to unhide it from the menus –
sudo nano /usr/share/applications/wine.desktop
Change NoDisplay=true to NoDisplay=false

Now, “Wine Windows Program Loader” is available as a choice in the Properties > Open With list.

Finally got around to making a collection of all the Firefox add-ons I use. The collection has been refined over the past 10 years or so and everything in this collection is compatible with Multiprocess (e10s).
https://addons.mozilla.org/en-US/firefox/collections/anonymous-51818734302cbd93c93ec183ba49fd59/e10s-compatible-toolkit-2017/
These addons are part of the reason I still prefer using Firefox. Privacy concerns aside, Chrome just isn’t that customizable – Chrome add-ons just aren’t as useful in my everyday browsing.
First, connect to Exchange Online PowerShell
$UserCredential = Get-Credential
$Session = New-PSSession -ConfigurationName Microsoft.Exchange -ConnectionUri https://outlook.office365.com/powershell-liveid/ -Credential $UserCredential -Authentication Basic -AllowRedirection
Import-PSSession $Session
Then, use the Search-Mailbox cmdlet
Search-Mailbox -Identity "MAILBOX1" -TargetMailbox "MAILBOX2" -TargetFolder "Moved From Old Mailbox" -LogLevel Full
Sources:
- https://technet.microsoft.com/en-us/library/jj984289(v=exchg.160).aspx
- https://community.spiceworks.com/topic/1208819-merging-2-mailboxes-to-single-user-in-office-365
Update 2: Here are 2 EFI folders from the comments. I haven’t tested these, all credits to the commenters. Thanks!
CP-EFI_10_12_4_9470m ( 2017-04-30 at 18:36)
EFI_High-Sierra_Osman-Afifi ( 2017-10-07 at 15:43)
Update: The macOS Sierra 10.12.4 update breaks backlight brightness control. See below for fixes.
Just in time for April Fools’ day, got a new hackintosh working. And this one even looks like a MacBook Pro!
I present to you, the EliteBook “Pro” (9470m).

EliteBook “Pro” 9470m. Please excuse the messy desktop icons.
The EliteBook 9470m was, if I recall correctly, HP’s second Ultrabook, and their first true “Enterprise” Ultrabook – that is, one with docking capability and easy field repairability . You can find a full review over at NotebookCheck.net. It was pretty popular with businesses who wanted to give their employees a more affordable and more IT-friendly “MacBook-like” device. Also, it was released back in late 2012, which is just over 4 years ago as of this writing. (Crazy! Time flies.) This means that they can be had relatively cheap in the off-lease market today, as the typical computer lease is between 3-5 years. My local computer store is selling them for under $400, which is a pretty good value in my opinion.
These days, installing macOS is relatively easy compared to 10-12 years ago when I first started messing with Hackintosh/OSx86, so I’ll just post my Clover “EFI” folder which should get you booted into macOS Sierra on the 1366×768 version of the 9470m. I did also swap out the Intel WiFi card for a Dell DW 1510 which works out-of-the-box.
Download my Clover EFI folder (zip 19MB): EFI 3 See below for 10.12.4 brightness fix
Working:
- Internal graphics with full acceleration, brightness control using scroll lock/pause-break keys
- Sound via VoodooHDA (built-in mic, speakers as well as TRRS headset jack. Volume and Mute fix in Info.plist necessary)
- Touchpad with 2-finger scroll
- Internal PS/2 keyboard
- 3 USB 3.0 ports
- Wired gigabit Ethernet
- WiFi (replacement DW 1510 Broadcom card)
- Built-in webcam
Not working:
- Sleep (wakes up instantly)
- Original Intel 6235 WiFi + Bluetooth
- TrackPoint/Nub/Nipple mouse
- Validity Fingerprint reader
- WiFi on/off button
Not tested (yet):
- Docking
- VGA-out
- DisplayPort-out
- HDMI Audio
- SD Card Reader
I will updated the lists as I test more things.
Main reference for this was RehabMan’s Elitebook guide.
10.12.4 Backlight Brightness control fix
Download updated EFI folder (zip 19MB): EFI 10.12.4
Fixes included:
- Removed NullCPUPowerManagement.kext
- Updated VoodooHDA.kext/Contents/Info.plist to include Mute Fix
- Added SSDT-PNLF.aml in ACPI/patched as per guide
- Edited config.plist to load SSDT-PNLF.aml
- Fixed backlight control (using this guide)
- Re-patched DSDT in MacIASL with the following fixes only from “RehabMan-Laptop”:
- battery_HP-ProBook-4x0s-G1.txt
- graphics_Rename-GFX0.txt
- graphics_HD4K_low.txt
- Added AppleBacklightInjector.kext
Extra .kexts for SD card reader: JMicron.zip
osx-usr-local