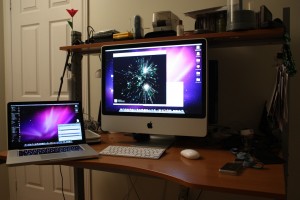
I did actually get my MBP (Unibody/2009/2.66GHz/SD) to triple-boot. I first partitioned my drive using the instructions found here: http://wiki.onmac.net/index.php/Triple_Boot_via_BootCamp
The command you need is :sudo diskutil resizeVolume [disk identifier] [disk size] [partition type] [“Partition label”] [partition size] [partition type] [“Partition label”] [partition size]
where [partition type] is one of the types that shows up when you run
sudo diskutil listFilesystems
After that, install Windows 7 as normal, by booting from the CD (press Option to get the menu). Once Windows 7 is installed, download and install EasyBCD. Then reboot and boot from the Ubuntu 9.10 64-bit CD (you NEED 9.10 if you have a unibody macbook, 9.04 doesn’t work). Follow the install prompts, and on the last screen that summarizes the installation actions, click Advanced. From the dropdown menu for where the bootloader is to be installed, pick your Ubuntu root partition.
Once the Ubuntu install finishes, reboot your system into Windows 7. Then run EasyBCD and add an entry for Linux/GRUB.
You now have triple-boot working. To boot to Windows 7, use option and select “Windows”. to boot to ubuntu, use option and select “Windows”, then pick Linux from the EasyBCD menu.
@ECHO off
for /F "eol=; tokens=1,2" %%A in (list.txt) do call :create %%A %%B
Goto END-create
REM ***************************************************************************
:create
echo %1 %2
REM net user %1 /add
goto :EOF
:END-create
ECHO.
pause
EXIT
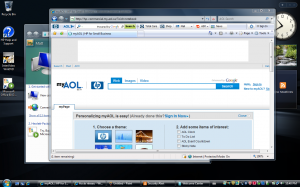
I’d forgotten how much Vista sucks… I waited through over 45 minutes of “Preparing you computer” and “Installing software” and “Measuring your computer’s performance” for this?
Well, I suppose there is the spiffy sidebar and flip 3D……
Or, to be more accurate, I forgot how much garbage OEMs put on your brand new PC. *cough* HPToshibaDell.
OOH COOL! McAfee, Norton, Windows Live OneCare AND ZoneAlarm! Now my computer is quadruple-protected!
But wait, there’s more you say? A copy of Microsoft Works AND a FREE trial of Microsoft Office? and AOL, Yahoo! and Google toolbars, each with pop-up blocking? AWESOME!
-_-
Update: I found the Telus and Bell .ipcc files in my home folder. Here they are: iPhone Carrier Support
or, individually: Telus_ca Bell_ca
If you updated to 3.1.2 before jailbreak/unlock, you need the original carrier’s SIM to activate before unlocking.
Otherwise, you need to manually enter APN settings and use PushFix.
For Telus:
Data Configurations
Quote:
Originally Posted by easternguy
|
For more info: http://www.howardforums.com/printthread.php?t=1586997
Alternatively, use http://help.benm.at/ to generate a MobileConfig file.
For Bell, see http://www.bell.ca/support/PrsCSrvWls_Configure_iPhone.page
The following instructions can be used to manually configure the settings on an unlocked Apple iPhone 3G for MMS and Browser on the Bell Mobility HSPA network.
- Follow the instructions in the user manual to install your Bell SIM card into the phone.
- Turn on the phone.
- On the Home screen, tap the Settings icon.
- Tap General.
- Tap Network.
- Tap Cellular Data Network.
- In the Cellular Data box, tap APN and enter: pda2.bell.ca
Leave the Username and Password blank.
- Scroll down, and in the MMS box:
– Tap APN and enter: pda2.bell.ca
– Leave the Username and Password blank.
– Tap MMSC and enter: http://mms.bell.ca/mms/wapenc
– Tap MMS Proxy and enter: web.wireless.bell.ca:80
– Leave the MMS Max Message Size and MMS UA Prof URL blank.
- Press the Home button to return to the Home screen.
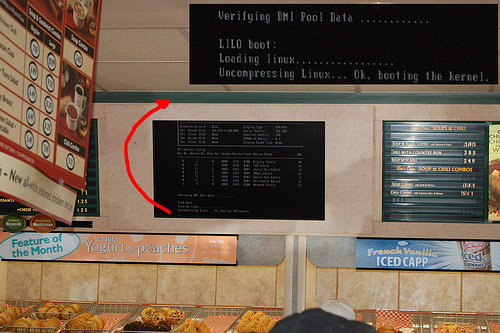
Early this morning I was at Tim Hortons. I had the opportunity to see this:
Tim Hortons uses LINUX!
tim hortons uses linux on Flickr – Photo Sharing!.
Ultimate NVIDIA® ION™ Netbook Bundle Contest.
My friend Alex Laplante was one of the winners of the NVIDIA ION netbook contest. Congratulations Alex!
Prasys has put together a nice cdboot package for OSX86 called Empire EFI. (A Star Wars reference, and a reference to Psystar’s proprietary Rebel EFI)
Looks pretty solid, and should make Snow Leopard installation easier.
See http://prasys.co.cc/2009/10/empire-efi/ for info and download.
Today was quite the day. As the title says, systems were failing all over the place. Our main switch at work (a Cisco 6509) crashed about 3 times this week, causing our vSphere environment to crash repeatedly, taking all the guest VMs with it. We searched for a long while before discovering that a faulty UPS battery was to blame for the switch’s instability. Meanwhile, we’re left with a misconfigured iSCSI SAN and 3 ESX hosts with no storage.
At home, my crazy MythTV/OpenVZ/KVM/PBX/Windows 2003/Seedbox/RADIUS server had to be shut down when my home network started acting up. DHCP stopped working, and the machines that were left had difficulty pinging each other. This time, a Cisco device was to blame. A WRT610N router that I use as an ABGN Access-point running DD-WRT had somehow bricked itself and started broadcasting packets on the network, thus flooding my routers and other computers. Then, I tried booting up my server again. MythTV and OpenVZ started up OK, but the qemu-server/kvm machines didn’t start, throwing “can’t open lock for VM 107 ‘/var/lock/qemu-server/lock-107.conf’ – No such file or directory”. Weird error. The fix is to create the /var/lock/qemu-server folder.
And finally, everything at home is up and running again. We’ll see tomorrow morning how things go at work. David was staying late today on the phone with Dell EqualLogic specialists, so fingers crossed!