Opt-out complete; your visits to this website will not be recorded by the Web Analytics tool. Note that if you clear your cookies, delete the opt-out cookie, or if you change computers or Web browsers, you will need to perform the opt-out procedure again.
You may choose to prevent this website from aggregating and analyzing the actions you take here. Doing so will protect your privacy, but will also prevent the owner from learning from your actions and creating a better experience for you and other users.
The tracking opt-out feature requires cookies to be enabled.
Installing Ubuntu 22.04 or Linux Mint on an HP Chromebook G5 EE works fine, except for the audio hanging and producing a loud beep until pulseaudio is restarted. The solution :
On 12/18/22 7:02 AM, Mark Hills wrote:
HP Chromebook (11a, G5 “Setzer”) uses snd_soc_sst_cht_bsw_rt5645 module
and presents a device “rt5650”.
can you share the result of ‘aplay -l’, wondering which platform driver you are using.
Audio works briefly, until after about 30 seconds it’s interrupted by a
square wave or short buffer cycling.
If this is with the SOF driver, there’s a known issue and a known workaround, please add this to /etc/modprobe.d/alsa-base.conf
I’ve found multiple guides on how to enable NVIDIA GPU access from lxc containers, however I had to combine the information from multiple sources to get a fully working setup. Here are the steps that worked for me.
Install dkms on your Proxmox host to ensure the nvidia driver can be auto-updated with new kernel versions. # apt install dkms
Download the nvidia-patch repo git clone https://github.com/keylase/nvidia-patch.git
Install the driver from step 2 on the host. For example, ./NVIDIA-Linux-x86_64-455.45.01.run
Run the nvidia-patch/patch.sh script on the host.
Install the same driver in each container that needs access to the Nvidia GPU, but without the kernel module. ./NVIDIA-Linux-x86_64-455.45.01.run --no-kernel-module
Run the nvidia-patch/patch.sh script on the lxc container.
On the host, create a script to initialize the nvidia-uvm devices. Normally these are created on the fly when a program such as ffmpeg calls upon the GPU, but since we need to pass the device nodes through to the containers, they must exist before the containers are started.
I saved the following script as /usr/local/bin/nvidia-uvm-init. Make sure to chmod +x !
#!/bin/bash
## Script to initialize nvidia device nodes.
## https://docs.nvidia.com/cuda/cuda-installation-guide-linux/index.html#runfile-verifications
/sbin/modprobe nvidia
if [ "$?" -eq 0 ]; then
  # Count the number of NVIDIA controllers found.
  NVDEVS=`lspci | grep -i NVIDIA`
  N3D=`echo "$NVDEVS" | grep "3D controller" | wc -l`
  NVGA=`echo "$NVDEVS" | grep "VGA compatible controller" | wc -l`
  N=`expr $N3D + $NVGA - 1`
  for i in `seq 0 $N`; do
    mknod -m 666 /dev/nvidia$i c 195 $i
  done
  mknod -m 666 /dev/nvidiactl c 195 255
else
  exit 1
fi
/sbin/modprobe nvidia-uvm
if [ "$?" -eq 0 ]; then
  # Find out the major device number used by the nvidia-uvm driver
  D=`grep nvidia-uvm /proc/devices | awk '{print $1}'`
  mknod -m 666 /dev/nvidia-uvm c $D 0
  mknod -m 666 /dev/nvidia-uvm-tools c $D 0
else
  exit 1
fi
Next, we create the following two systemd service files to start this script, and the nvidia-persistenced:
# NVIDIA Persistence Daemon Init Script
#
# Copyright (c) 2013 NVIDIA Corporation
#
# Permission is hereby granted, free of charge, to any person obtaining a
# copy of this software and associated documentation files (the "Software"),
# to deal in the Software without restriction, including without limitation
# the rights to use, copy, modify, merge, publish, distribute, sublicense,
# and/or sell copies of the Software, and to permit persons to whom the
# Software is furnished to do so, subject to the following conditions:
#
# The above copyright notice and this permission notice shall be included in
# all copies or substantial portions of the Software.
#
# THE SOFTWARE IS PROVIDED "AS IS", WITHOUT WARRANTY OF ANY KIND, EXPRESS OR
# IMPLIED, INCLUDING BUT NOT LIMITED TO THE WARRANTIES OF MERCHANTABILITY,
# FITNESS FOR A PARTICULAR PURPOSE AND NONINFRINGEMENT. IN NO EVENT SHALL THE
# AUTHORS OR COPYRIGHT HOLDERS BE LIABLE FOR ANY CLAIM, DAMAGES OR OTHER
# LIABILITY, WHETHER IN AN ACTION OF CONTRACT, TORT OR OTHERWISE, ARISING
# FROM, OUT OF OR IN CONNECTION WITH THE SOFTWARE OR THE USE OR OTHER
# DEALINGS IN THE SOFTWARE.
#
# This is a sample systemd service file, designed to show how the NVIDIA
# Persistence Daemon can be started.
#
[Unit]
Description=NVIDIA Persistence Daemon
Wants=syslog.target
[Service]
Type=forking
ExecStart=/usr/bin/nvidia-persistenced --user nvidia-persistenced
ExecStopPost=/bin/rm -rf /var/run/nvidia-persistenced
[Install]
WantedBy=multi-user.target
Next, symlink the two service definition files into /etc/systemd/system
Now you should see all the nvidia device nodes have been created # ls -l /dev/nvidia* crw-rw-rw- 1 root root 195, 0 Dec 6 18:07 /dev/nvidia0 crw-rw-rw- 1 root root 195, 1 Dec 6 18:10 /dev/nvidia1 crw-rw-rw- 1 root root 195, 255 Dec 6 18:07 /dev/nvidiactl crw-rw-rw- 1 root root 195, 254 Dec 6 18:12 /dev/nvidia-modeset crw-rw-rw- 1 root root 511, 0 Dec 6 19:00 /dev/nvidia-uvm crw-rw-rw- 1 root root 511, 0 Dec 6 19:00 /dev/nvidia-uvm-tools
/dev/nvidia-caps:
total 0
cr-------- 1 root root 236, 1 Dec 6 18:07 nvidia-cap1
cr--r--r-- 1 root root 236, 2 Dec 6 18:07 nvidia-cap2
Check the dri devices as well # ls -l /dev/dri* total 0 drwxr-xr-x 2 root root 100 Dec 6 17:00 by-path crw-rw---- 1 root video 226, 0 Dec 6 17:00 card0 crw-rw---- 1 root video 226, 1 Dec 6 17:00 card1 crw-rw---- 1 root render 226, 128 Dec 6 17:00 renderD128
Take note of the first number of each device after the group name. In the listings above I have 195, 511, 236 and 226.
Now we need to edit the lxc container configuration file to pass through the devices. Shut down your container, then edit the config file – example /etc/pve/lxc/117.conf. The relevant lines are below the swap: 8192 line
Now, start your container back up. You should be able to use NVENC features. You can test by using ffmpeg: $ ffmpeg -i dQw4w9WgXcQ.mp4 -c:v h264_nvenc -c:a copy /tmp/rickroll.mp4
You should now have working GPU transcode in your lxc container!
If you get the following error, recheck and make sure you have set the correct numeric values for lxc.cgroup.devices.allow and restart your container.
[h264_nvenc @ 0x559f2a536b40] Cannot init CUDA
Error initializing output stream 0:0 -- Error while opening encoder for output stream #0:0 - maybe incorrect parameters such as bit_rate, rate, width
or height
Conversion failed!
Another way to tell the values are incorrect is having blank (———) permission lines for the nvidia device nodes. You will get this inside any containers that are started before the nvidia devices are initialized by the nvidia-uvm-init script on the host.
$ ls -l /dev/nvidia*
---------- 1 root root        0 Dec  6 18:04 /dev/nvidia0
crw-rw-rw- 1 root root 195, 255 Dec  6 19:02 /dev/nvidiactl
---------- 1 root root        0 Dec  6 18:04 /dev/nvidia-modeset
crw-rw-rw- 1 root root 511,   0 Dec  6 19:02 /dev/nvidia-uvm
crw-rw-rw- 1 root root 511,   1 Dec  6 19:02 /dev/nvidia-uvm-tools
Sometimes, after the host has been up for a long time, the /dev/nvidia-uvm or other device nodes may disappear. In this case, simply run the nvidia-uvm-init script, perhaps schedule it to run as a cron job.
# Install the OpenSSH Server
Add-WindowsCapability -Online -Name OpenSSH.Server~~~~0.0.1.0
# Set service to Automatic startup
Set-Service -Name sshd -StartupType 'Automatic'
# Start service
Start-Service sshd
# Confirm the Firewall rule is configured. It should be created automatically by setup.
Get-NetFirewallRule -Name *ssh*
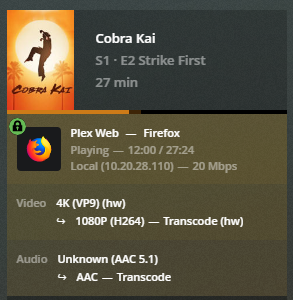
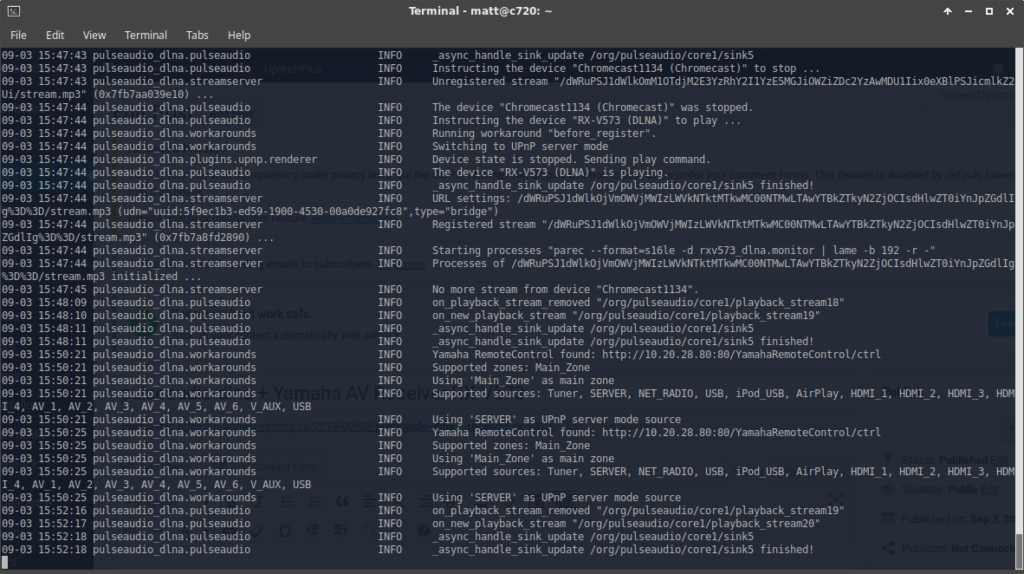
Install pulseaudio-dlna from Ubuntu default repos, then run pulseaudio-dlna. The first time, it failed, but I think that’s because the receiver was switched off. Console output did show it had been detected though. After switching on the receiver then running pulseaudio-dlna again, it redirected my currently playing audio to the receiver after a few seconds! So far this is the first time I’ve managed to get DLNA live streaming working with this receiver in 5 years of owning it.
Note: this post is more intended for personal reference; as such the quality of writing is not up to my standard, but I’ve decided to publish it as-is anyway since I don’t have time to review and figure it could be useful to someone.
I was looking for a good portable Linux laptop to that I could carry around without being too worried about battery life or the device getting scratched up in my bag. I tried a few different devices, including the HP Folio 13, ThinkPad X131e, GPD Pocket, Dell Latitude E7240. Finally I settled on the Acer C720 Chromebook. The main points in favour of this device are, for me:
Compact, thin and light (11.6″)
Relatively low cost (4GB RAM model can be had for under $150 CAD)
Proper modern low-voltage Intel Core processor (Celeron 2957U – Haswell) and not an Atom core or high-end i7
Dual-band Wi-Fi and Bluetooth
and the main downsides:
Basic TN LCD panel
16GB storage
Runs Chrome OS
Chrome OS keyboard layout
The good news is the downsides are fairly easily remedied.
TN LCD Panel
The Acer C720 uses a standard 11.6″ LED backlit eDP panel. I was able to find an IPS panel to replace it on laptopscreen.com (model N116BCA-EA1). The panel replacement is fairly straightforward; care needs to be taken not to break the LCD bezel or any of the clips.
16GB SSD
The SSD on the C720 is a standard M.2 2242 SATA SSD. The M.2 slot is easily accessible after removing the Chromebook’s bottom cover.
Runs Chrome OS
The Chrome OS/Linux dual-boot process is done by using the chrx script (https://github.com/reynhout/chrx). Remember to remove the write-protect screw while the bottom cover is off.
Chrome OS keyboard layout
This was arguably the hardest part. I chose to run Xubuntu, so the steps I went through apply to that environment. Chrx by default provides good defaults, mapping the back, forward, refresh, brightness and volume keys. The big issue for me was the placement of the power button (above the backspace key)
Prevent systemd-logind from handling the power button
edit /etc/systemd/logind.conf and add the following line:
HandlePowerKey=ignore
Prevent xfce power manager from handling the power button
xfconf-query -c xfce4-power-manager -p /xfce4-power-manager/logind-handle-power-key -s true
Allow xfce power manager to handle lid switch
xfconf-query -c xfce4-power-manager -p /xfce4-power-manager/logind-handle-lid-switch -s false
Remap power key to Delete
xmodmap -e “keycode 124 = Delete”
To find the keycode, stop lightdm, startx to start a basic X session, then use xev to get the keycode for the power key.
Other tweaks
Consistent custom wallpaper/background for boot splash, login, and lock screen
gnome-screensaver uses the Gnome DE’s wallaper setting. Configure this via CLI:
gsettings set org.gnome.desktop.background picture-uri file:///usr/local/share/wallpaper/animevillage.jpg
lightdm-gtk-greeter can be configured using GUI tool lightdm-gtk-greeter-settings or by editing /etc/lightdm/lightdm-gtk-greeter.conf
plymouth/boot splash:
go to /usr/share/plymouth/themes and create a copy of the xubuntu-logo directory. I called mine xubuntu-logo-mod
sudo cp -R xubuntu-logo xubuntu-logo-mod
within the new xubuntu-logo-mod directory, rename and edit config files accordingly
325 cd xubuntu-logo-mod/
326 ls
327 sudo mv xubuntu-logo.plymouth xubuntu-logo-mod.plymouth
328 sudo mv xubuntu-logo.script xubuntu-logo-mod.script
329 sudo nano xubuntu-logo-mod.script
replace wallpaper.png in xubuntu-logo-mod directory with desired image. I used ImageMagick’s convert tool to convert my jpg format image to png.
add new theme we have created as an “alternative” with higher priority
Find out priority and config for current theme
sudo update-alternatives –query default.plymouth
Name: default.plymouth
Link: /usr/share/plymouth/themes/default.plymouth
Status: auto
Best: /usr/share/plymouth/themes/xubuntu-logo-mod/xubuntu-logo-mod.plymouth
Value: /usr/share/plymouth/themes/xubuntu-logo-mod/xubuntu-logo-mod.plymouth
Create new alternative with higher priority
sudo update-alternatives –install /usr/share/plymouth/themes/default.plymouth default.plymouth /usr/share/plymouth/themes/xubuntu-logo-mod/xubuntu-logo-mod.plymouth 200
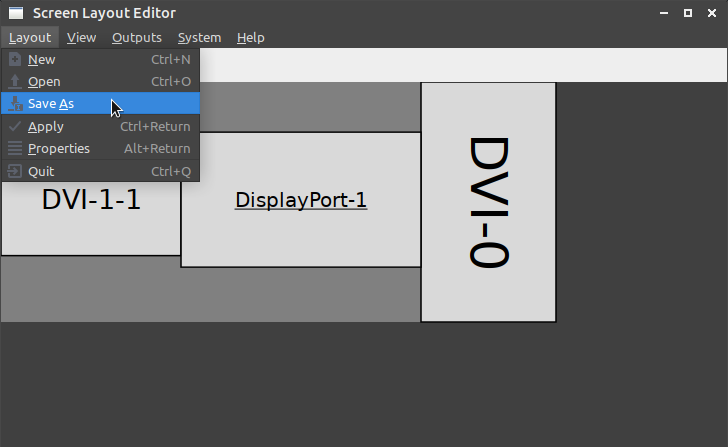
Where “/usr/local/bin/monitorlayout.sh” is the path to the script saved from arandr.
For sddm, instead edit /usr/share/sddm/scripts/Xsetup.sh and add a line to have it run the same “/usr/local/bin/monitorlayout.sh” script.
#!/bin/sh
# Xsetup - run as root before the login dialog appears

# set screen layout using Xrandr
/usr/local/bin/monitorlayout.sh
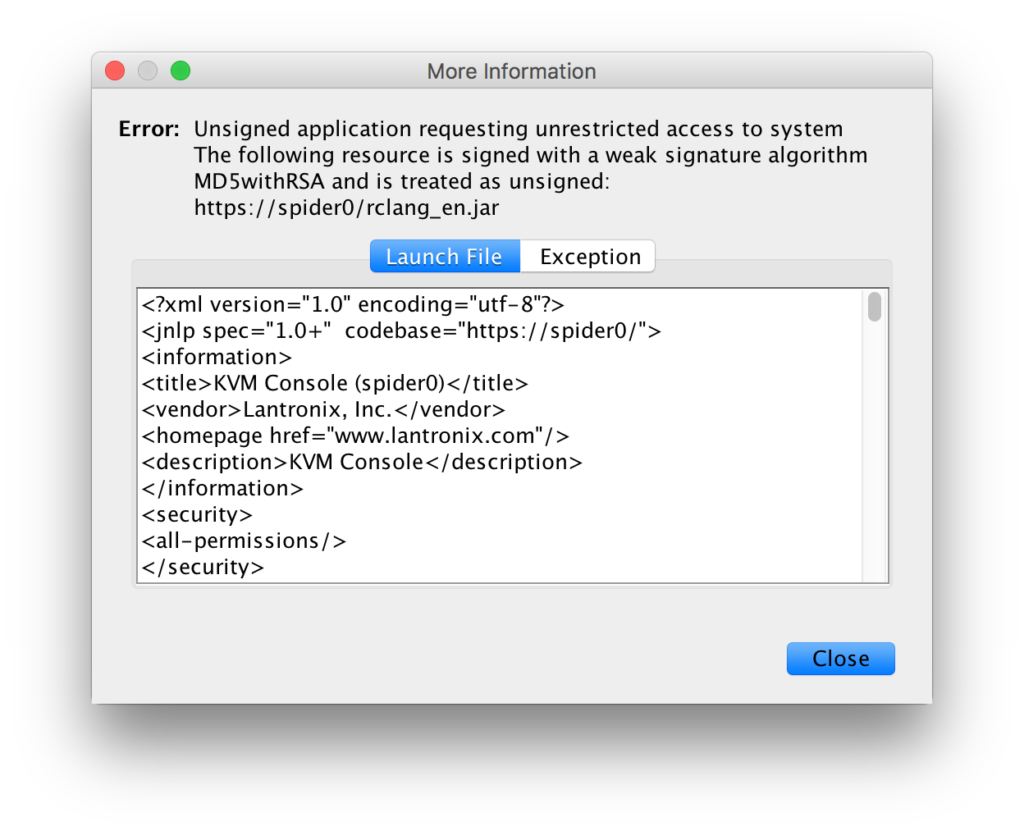
Oracle have decided to disable access to Java apps that use MD5withRSA signatures. For instance, when launching the .jnlp file to connect to my Lantronix Spider remote KVM, I am presented with this error:
To fix this, we have to change Java’s security settings. Unfortunately, settings for signature algorithms are not in the Java Control Panel, so we have to edit the config files directly.
On macOS, the default JRE installation’s root directory ($JAVA_HOME) is
where “1.8.0_131” is your specific Java version, and on Linux, JRE is installed in
/usr/lib/jvm/java-1.7.0-openjdk-amd64
once again where “1.7.0-openjdk-amd64” is your specific Java version.
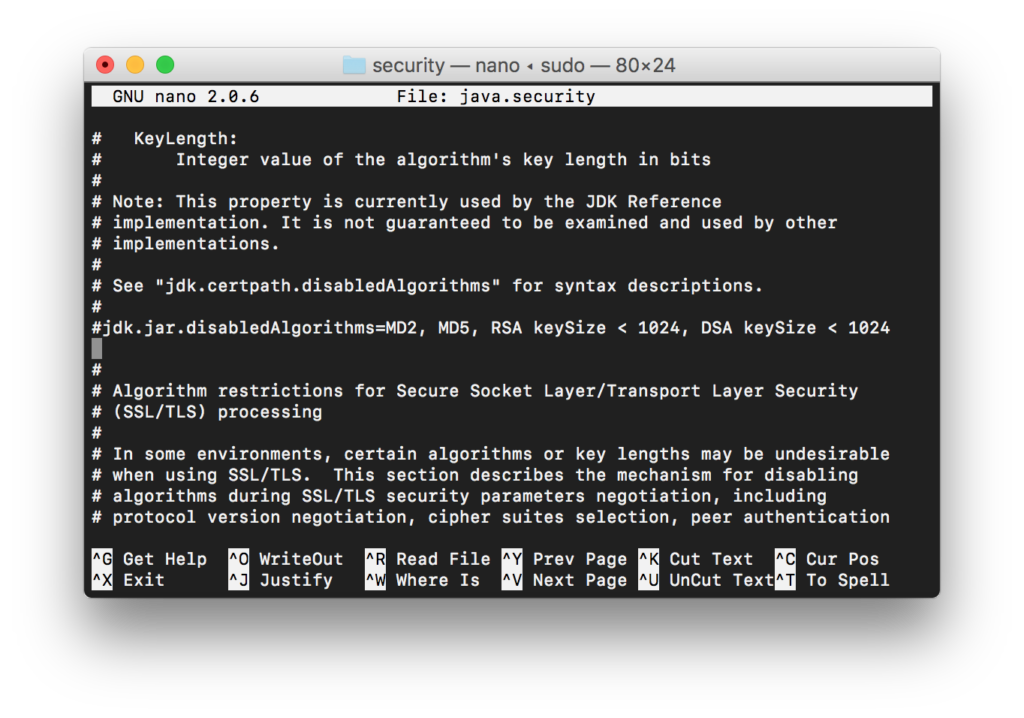
In the JRE directory, we then need to edit the file
$JAVA_HOME/lib/security/java.security
and comment out the line that starts with “jdk.jar.disabledAlgorithms” by prefixing a #. Note that this will allow jar files signed with any algorithms to run, which can be considered insecure.
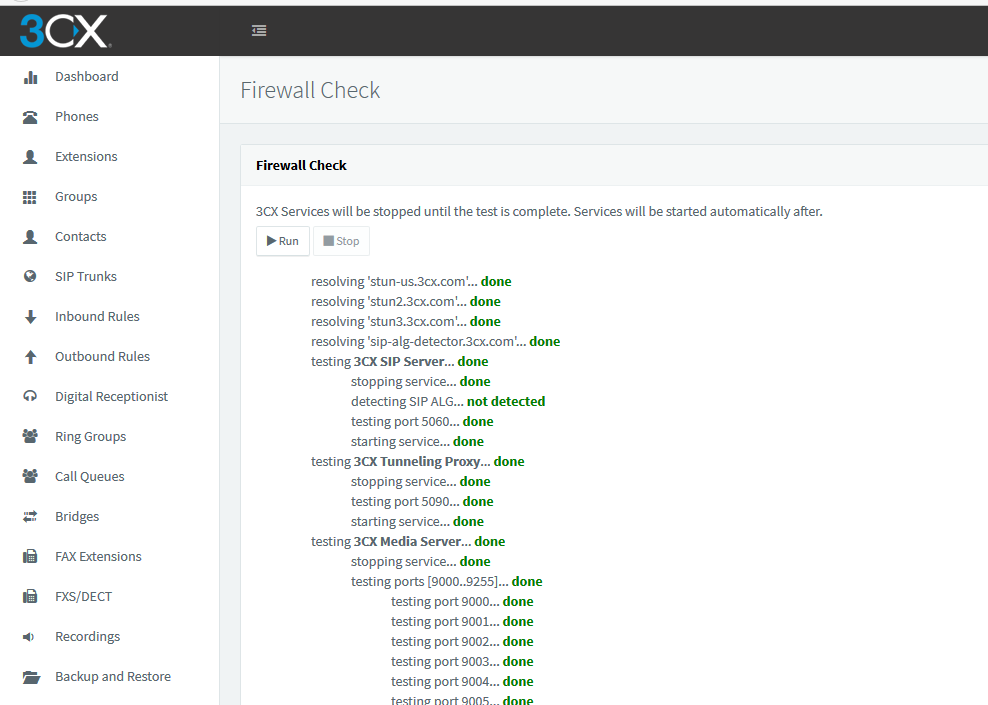
Quick notes on some tweaks I had to do to get 3CX’s Firewall Check to pass behind my home pfSense firewall:
Allow PBX to access Google DNS (8.8.8.8): It seems like 3CX is hardcoded to use 8.8.8.8 at the license validation stage. I had blocked 8.8.8.8 on my end to prevent Android and Chromecast devices from preferring external DNS over my local DNS server and this caused the error License_Error httpsError in 3CX.
Create DHCP-Static mapping for 3CX server.
Configure NAT Port-forwarding rules: I used the list at https://www.3cx.com/ports-used-3cx-phone-system-v14-v15/ for reference. Table reproduced below.
Protocol
Port (Default)
Description
Port Forwarding Required
TCP
5001 or 443
v15: HTTPs port of Web Server.This port can be configured.
Yes – if you intend on using a 3CX client, Bridge Presence, Remote IP Phones from outside your LAN and 3CX WebMeeting functionality.
TCP
5015
V15: This port is used for the online Web-Based installer wizard (NOT 3CX config command line tool)only during the installation process.
Optional – During the installation process when the Web-Based installer is used from external source
UDP & TCP
5060
3CX Phone System (SIP)
Yes – if you intend on using VoIP Providers, WebRTC and Remote Extensions that are NOT using the 3CX Tunnel Protocol
TCP
5061
3CX Phone System (SecureSIP) TLS
Yes – if you intend on using Secure SIP remote extensions
UDP & TCP
5090
3CX Tunnel Protocol Service Listener
Yes -if you intend on using remote extensions using the 3CX Tunnel Protocol (within the 3CX clients for Windows / Android / iOS) or when using the 3CX Session Border Controller
UDP
9000-9500 (default)
3CX Media Server (RTP) – WAN audio/video/t38 streams
Yes – if you intend on using remote extensions or a VoIP Provider
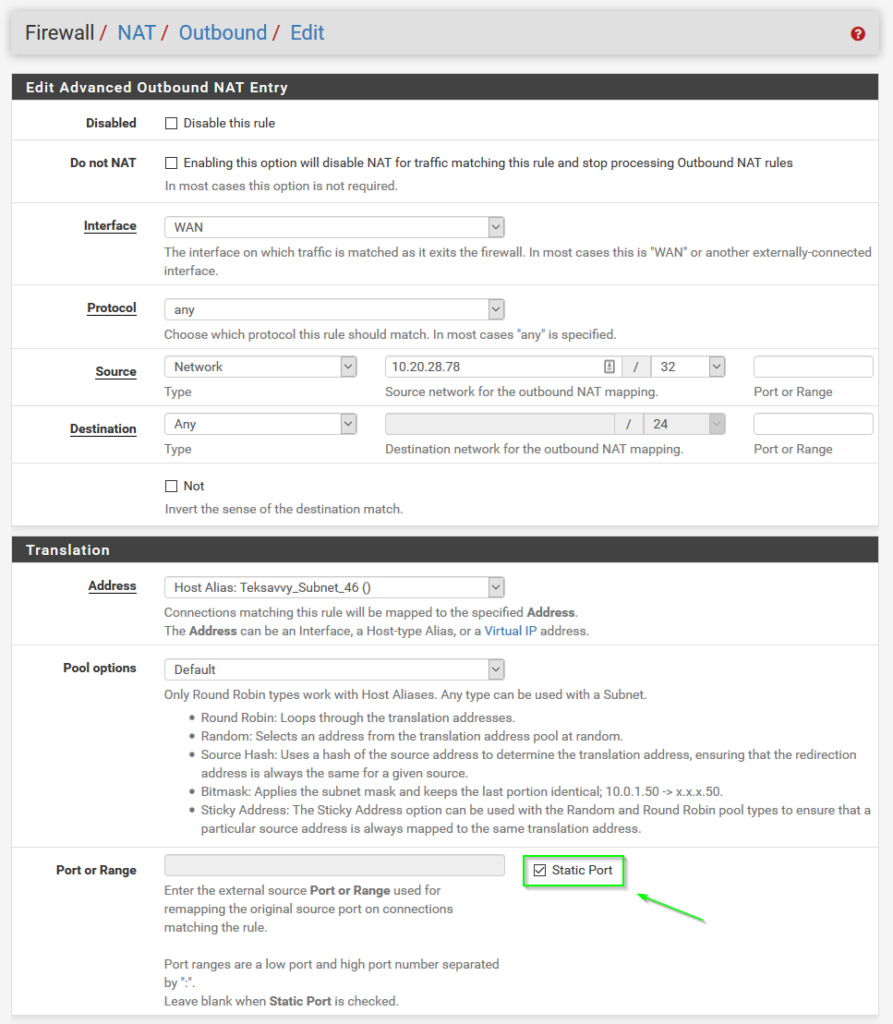
Configure Outbound NAT Static rule for 3CX server: Automatic Outbound NAT (Default pfSense config) causes a random source port to be used for requests outbound to the Internet. 3CX doesn’t like this behaviour, so we need to add an Advanced Outbound NAT rule to force traffic coming from the 3CX server to use “Static Port” translation, as seen in the following screenshot. For Source, select “Network” and use the 3CX server IP with a mask of /32 (single host).
After completing these steps, the 3CX Firewall Check passes all green.
Finally got around to making a collection of all the Firefox add-ons I use. The collection has been refined over the past 10 years or so and everything in this collection is compatible with Multiprocess (e10s).
These addons are part of the reason I still prefer using Firefox. Privacy concerns aside, Chrome just isn’t that customizable – Chrome add-ons just aren’t as useful in my everyday browsing.