Rooting the PBX

By , 2009-12-14 21:44

My home PBX was installed and working well. However, today I discovered that my VoIP provider started blocking outgoing calls from the Asterisk user agent. The fix is to edit /etc/asterisk/sip.conf and change the useragent line. However, the distro I chose was very much a PBX appliance. No SSH, no shell, only Web UI access. But, I knew it was a Linux box, probably CentOS or RHEL based. So i decided I’d try my hand at retaking control of the system.

First step was to boot into single-user mode. This was quite easy. Just interrupt GRUB and add “single” to the kernel options.

Once at the shell prompt, you might want to add a regular user.

adduser matt

Then, try changing the root password.

passwd root

Unfortunately this does not work. It fails with “Authentication Token Manipulation Error”. To fix this, use pwconv. (Thanks to mohammedz)

Then try passwd root again, it should work this time.

Next, enable ssh. Run chkconfig sshd on.

Now, edit /etc/asterisk/sip.conf and change the useragent. šŸ™‚

CBC News Photogallery – Week in Pictures

By , 2009-12-12 10:10

CBC News Photogallery.

A beautiful set of pictures from around the world showcasing current events.

First snow of the year in TO

By , 2009-12-09 21:40

Today was the first snowstorm of winter 2009/2010. Made for a fun drive to work… Apparently the City of Toronto figured there was no point in sending out snowplows.

13370 Gmail

By , 2009-12-07 00:00

Screen shot 2009-12-07 at 12.01.59 AM

Building MacPorts vpnc with OpenSSL enabled

By , 2009-12-06 17:29

run a sudo port install vpnc

then cd to /opt/local/var/macports/distfiles/vpnc
tar xzvf vpnc-0.5.3.tar.gz

then cd to vpnc-0.5.3 and edit the Makefile. find and uncomment the lines pertaining to OpenSSL GPL violation:

# Some distributions like Suse and Fedora seem to think otherwise.
 
# Comment this in to obtain a binary with certificate support which is
# GPL incompliant though.
OPENSSL_GPL_VIOLATION = -DOPENSSL_GPL_VIOLATION
OPENSSLLIBS = -lcrypto

matt@matthieu-imac:/opt/local/var/macports/distfiles/vpnc$ sudo mv vpnc-0.5.3.tar.gz vpnc-0.5.3-GPl.tar.gz
matt@matthieu-imac:/opt/local/var/macports/distfiles/vpnc$ sudo tar czvf vpnc-0.5.3.tar.gz vpnc-0.5.3

sudo port uninstall vpnc
sudo port clean vpnc

Now, you’d think you can build vpnc using macports. however, running sudo port install vpnc gives:

$ sudo port install vpnc
—>Ā  Computing dependencies for vpnc
—>Ā  Fetching vpnc
—>Ā  Verifying checksum(s) for vpnc
Error: Checksum (sha1) mismatch for vpnc-0.5.3.tar.gz
Error: Checksum (rmd160) mismatch for vpnc-0.5.3.tar.gz
Error: Target org.macports.checksum returned: Unable to verify file checksums
Error: Status 1 encountered during processing.

Macports checks the checksum of the tar.gz to ensure that your download isn’t corrupted. So open up a new Terminal window.

$ cd /opt/local/var/macports/sources/rsync.macports.org/release/ports/net/vpnc/

$ sudo nano Portfile

Find the current checksums:

checksums           sha1 321527194e937371c83b5e7c38e46fca4f109304 \
                    rmd160 6f3926901e75dc98762f6ef45782930f2fb76a2f

Back in your other Terminal window,
matt@matthieu-imac:/opt/local/var/macports/distfiles/vpnc$ shasum vpnc-0.5.3.tar.gz
22feb011388d0d7d1ef2c81ff2f1fb22039c475aĀ  vpnc-0.5.3.tar.gz

Replace the sha1 checksum with the one you found using the shasum command. Then delete the \ and the whole rmd160 line.

Now run sudo port install vpnc. it should now build with OpenSSL support!

Now only one thing left, install the TunTap driver from http://tuntaposx.sourceforge.net/.

And vpnc works! edit your config file in /opt/local/etc/vpnc.

Translation Party

By , 2009-12-04 16:08

Translation Party.

I was bored today. I wonder what Himeji Castle is?

Update: This is Himeji castle. Who says silly web games can’t also be educational? Another good one: #5532295

Macbook Pro Triple-Boot

By , 2009-12-04 00:17

I did actually get my MBP (Unibody/2009/2.66GHz/SD) to triple-boot. I first partitioned my drive using the instructions found here: http://wiki.onmac.net/index.php/Triple_Boot_via_BootCamp

The command you need is :sudo diskutil resizeVolume [disk identifier] [disk size] [partition type] [“Partition label”] [partition size] [partition type] [“Partition label”] [partition size]

where [partition type] is one of the types that shows up when you run
sudo diskutil listFilesystems

After that, install Windows 7 as normal, by booting from the CD (press Option to get the menu). Once Windows 7 is installed, download and install EasyBCD. Then reboot and boot from the Ubuntu 9.10 64-bit CD (you NEED 9.10 if you have a unibody macbook, 9.04 doesn’t work). Follow the install prompts, and on the last screen that summarizes the installation actions, click Advanced. From the dropdown menu for where the bootloader is to be installed, pick your Ubuntu root partition.

Once the Ubuntu install finishes, reboot your system into Windows 7. Then run EasyBCD and add an entry for Linux/GRUB.

You now have triple-boot working. To boot to Windows 7, use option and select “Windows”. to boot to ubuntu, use option and select “Windows”, then pick Linux from the EasyBCD menu.

Simple script to read 2 variables from text file, space-delimited

By , 2009-12-03 14:51

@ECHO off
for /F "eol=; tokens=1,2" %%A in (list.txt) do call :create %%A %%B
Goto END-create
REM ***************************************************************************
:create
echo %1 %2
REM net user %1 /add
goto :EOF

:END-create
ECHO.
pause
EXIT

Windows Vista

By , 2009-12-02 16:42

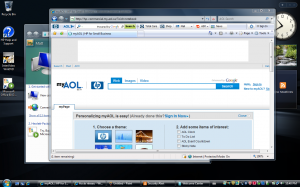
I’d forgotten how much Vista sucks… I waited through over 45 minutes of “Preparing you computer” and “Installing software” and “Measuring your computer’s performance” for this?

Well, I suppose there is the spiffy sidebar and flip 3D……

WindowsVista

Or, to be more accurate, I forgot how much garbage OEMs put on your brand new PC. *cough* HPToshibaDell.

OOH COOL! McAfee, Norton, Windows Live OneCare AND ZoneAlarm! Now my computer is quadruple-protected!
But wait, there’s more you say? A copy of Microsoft Works AND a FREE trial of Microsoft Office? and AOL, Yahoo! and Google toolbars, each with pop-up blocking? AWESOME!

-_-

iPhone Unlocking

By , 2009-12-01 10:36

Update: I found the Telus and Bell .ipcc files in my home folder. Here they are: iPhone Carrier Support
or, individually: Telus_ca Bell_ca

If you updated to 3.1.2 before jailbreak/unlock, you need the original carrier’s SIM to activate before unlocking.

Otherwise, you need to manually enter APN settings and use PushFix.
For Telus:

Data Configurations

Quote:
Originally Posted by easternguy
APN: sp.telus.com
No username/password
MMS APN: sp.telus.com
MMSC: http://aliasredirect.net/proxy/mmsc
MMS Proxy: 74.49.0.18:80
Tethering APN: isp.telus.com

For more info: http://www.howardforums.com/printthread.php?t=1586997

Alternatively, use http://help.benm.at/ to generate a MobileConfig file.

For Bell, see http://www.bell.ca/support/PrsCSrvWls_Configure_iPhone.page

The following instructions can be used to manually configure the settings on an unlocked Apple iPhone 3G for MMS and Browser on the Bell Mobility HSPA network.

  1. Follow the instructions in the user manual to install your Bell SIM card into the phone.
  2. Turn on the phone.
  3. On the Home screen, tap theĀ Settings icon.
  4. TapĀ General.
  5. TapĀ Network.
  6. TapĀ Cellular Data Network.
  7. In the Cellular Data box, tapĀ APN and enter: pda2.bell.ca
    Leave the Username and Password blank.
  8. Scroll down, and in the MMS box:
    – TapĀ APN and enter: pda2.bell.ca
    – Leave the Username and Password blank.
    – TapĀ MMSC and enter: http://mms.bell.ca/mms/wapenc
    – TapĀ MMS Proxy and enter: web.wireless.bell.ca:80
    – Leave the MMS Max Message Size and MMS UA Prof URL blank.
  9. Press theĀ Home button to return to the Home screen.

Custom theme by me. Based on Panorama by Themocracy